12/09/2010

Tips To Take Jewelry Photo


Do you ever wanted to take great picture of the Jewelry? Here is the trick ...
Jewelry can be one of the most difficult subjects to shoot because you are shooting small subjects which are generally very reflective and hard to light. You may want to look for a book or a website on specific techniques on this type of shooting as many pros spend a lifetime perfecting the techniques, and there is more information than can be covered in a short article.
However, a Micro-Nikkor lens (or more generally a "macro" lens) is a special lens designed to take very sharp images at very close focus distances. Nikon offer several different options here:
Nikon 200mm f/4.0D ED-IF AF Micro-Nikkor Lens for Nikon Digital SLR CamerasNikon 60mm f/2.8D AF Micro-Nikkor Lens for Nikon Digital SLR CamerasNikon 60mm f/2.8G ED AF-S Micro-Nikkor Lens for Nikon DSLR CamerasNikon 85mm f/3.5G AF-S DX ED VR Micro Nikkor Lens for Nikon Digital SLR Cameras
Each of the Micro-Nikkor allow the same 1:1 reproduction size but the longer focal lengths (i.e.105mm) allow you to be farther away, making it easier to properly light the subject. Other tips:
1) Use a sturdy tripod to hold the camera still.
2) Use small apertures (i.e. f22) to increase depth-of-field (zone of sharp focus) so that the entire subject is in focus.
3) "Tent" style lighting where the lights are outside a sheer fabric "tent" of diffusion material can reduce shadows/ reflections. Shoot through a hole in the tent.
4) Reflector cards can also be used to control the light.

Continue Reading...

What's the heck about Non-AI Lens, AI-Lens and AI-S Lens?

In 1977 Nikon introduced a new system for coupling the lens to the cameras exposure system. This new coupling system was called "Automatic maximum aperture indexing" or "Ai" for short. This change did not effect the traditional Nikon bayonet mount, thus allowing Ai (and the latter AF and AIS) lenses to be fitted to older non-Ai cameras.
The Ai lever on a Nikon FM2n
However, while Ai lenses where backwards compatible with non-Ai cameras, non Ai lenses where not compatible with all Ai cameras. The Nikon FM, FE, EL2, F3, F4 and Nikkormat FT3 cameras used the Ai metering system but allowed non-Ai lenses to be fitted due to the metering coupling lever being able to be disengaged. The F5 can have this mechanism fitted as an optional extra, please contact your local Nikon representive for more details. The F2A and F2AS were Ai cameras but the Ai mechanism was fitted to the removable metering prism.
A Nikkor Ai lens, note the Ai coupling ridge high-lighted by the red ring.
The AIs lens was created when the aperture mechanism of the AI lens was changed to allow automatic aperture control, with cameras such as the FA and N2000. This modification means that the aperture increments of the AIS lens can be controlled more precisely by the camera.
You can tell if a lens is AIS when:
  • The minimum aperture (both the main larger and smaller direct read out figures) are marked in orange i.e. F16,
  • A notch has been taken off the rear bayonet mount, above the lens locking notch. This allows certain Nikon cameras to detect if an Ais lens is fitted or not. See images below.
A picture of a non-Ai Nikkor lens. Note the lack of the Ai coupling ridge, however note that at the rear of the lens, the aperture ring protrudes slightly over the bayonet mount and therefore can damage the Ai lever on Ai cameras

Image
A Nikon Ai lens note no Notch above lens locking cut out.

A Nikon Ais lens, with lens type signaling pin notch ( highlighted red circle ).
Continue Reading...

10/01/2010

How To Use ML-L3 Remote Control

Nikon ML-L3 Wireless Remote Control for Nikon D40, D40x, D60, D80 & D90 Digital SLR Cameras
 The optional ML-L3 remote control (shown above) can be used for self-portraits or to reduce blur caused by camera shake. There are two settings that can be used with the ML-L3.


Shooting mode
Description
 Delayed remote
Gives operator time to pose when taking self-portrait using
remote control.
 Quick-response remote
Ensures quick shutter response; can be used to reduce blurring
caused by camera shake.

Long Time-Exposures

When the ML-L3 remote control is used in M mode, users can selected '- -' as the shutter speed. At this setting, the shutter opens when the shutter-release button on the optional ML-L3 remote control is pressed (2 seconds after the button is pressed in delayed remote mode) and remains open until the remote-control shutter-release button is pressed a second time (maximum exposure time is 30 minutes). Nikon recommends using a fully-charged EN-EL3 battery or an optional EH-5 AC adapter when using long exposures. For information regarding using the ML-L3 with flash please see the Cameras User manual.

Using the ML-L3 remote control:

  1. Mount the camera on a tripod (recommended) or place the camera on a stable, level surface.
  2. For D90 users:  Press the   button and rotate main command dial until   (delayed remote) or  (quick response remote) is displayed in the control panel. 
  3. Frame the photograph. In autofocus (AF) mode, the camera shutter-release button can be used to check focus, although only the shutter release-button on the remote control can be used to release the shutter. Note - To ensure correct exposure in modes other than M, cover the viewfinder eyepiece with your hand or with the supplied DK-5 eyepiece cap before pressing the shutter-release button. This will prevent light entering via the viewfinder from interfering with the autoexposure operation.Aim the transmitter on the ML-L3 at the infrared receiver on the camera and press the shutter-release button on the ML-L3 (when using the remote outdoors, make sure that the subject is not backlit and that the line of site between the transmitter and the infrared receiver is not blocked by the lens or other obstacles). The maximum operational distance of the ML-L3 is 5m directly in front of the camera.
  4. Aim the transmitter on the ML-L3 at the infrared receiver on the camera and press the shutter-release button on the ML-L3 (when using the remote outdoors, make sure that the subject is not backlit and that the line of site between the transmitter and the infrared receiver is not blocked by the lens or other obstacles). The maximum operational distance of the ML-L3 is 5m directly in front of the camera.

  5. Custom Setting 2
    Shooting mode
    AF-S (Single-servo AF)
    AF-C (Continuous-servo AF)
     Delayed remote
    Once camera has focused, self timer lamp will blink for 2s before shutter is released. If unable to focus, camera will return to standby without releasing shutter.
    Self-timer lamp blinks for 2s before shutter is released. Camera does not focus.
     Quick response remote
    Shutter is released immediately after camera focuses. Self-timer lamp will flash when shooting is complete. If unable to focus, camera will return to standby without releasing shutter.
    Camera releases shutter immediately without focusing. Self-timer lamp will flash when shooting is complete.
    To return to single-frame or continuous shooting mode, turn the camera off or rotate the mode dial to another setting. The shooting mode in effect before remote control mode was selected will also be restored if no operations are performed for the time selected for Custom Setting 25. The default setting is one minute.


Alternative to Nikon ML-L3
Opteka RC-2 Wireless Remote Control for Nikon D40, D40x, D50, D60, D70, D70s, D80, D90, D3000, & D5000 Digital SLR Camera (Nikon ML-L3 Replacement)
Continue Reading...

8/05/2010

Back To Basic - Your Camera Buddy

We all know cameras are cool, but how much do you know about 
camera hardware and accessories? If the answer is "not a lot," read on!

Most camera hardware is designed for SLR cameras, and not point and shoot cameras. 
But, I don't like to make people feel left out! For those of you out there with a point 
and shoot camera, you can still pick up some cool accessories like camera bags, 
tripods, and media cards to enhance your digital photography. 

Most camera hardware options contradict the benefits of a point and shoot camera 
anyway, namely: convenience, ease of use, and small size for portability. 
When you start adding hardware, things become a little more advanced.

For those of you who have SLR cameras (or hope to get one this holiday season!), 
here are a few hardware options you might be interested in:


External Flash
Your SLR camera already comes with a built in flash, which is fine for snapshots 
and candid photos, but really only works well when the subject is within 15 feet. 
Also, the built in flashes almost always give people red eye, because the flash 
and the lens are so close together and are pointed at the same angle when you
 take a photo. 
flash-camera

An external flash allows you to move the flash away from the lens and use a 
different angle to light your shot. Even moving it 6-12 inches away from the 
lens can eliminate red eye, though if you are shooting from a long distance 
away, you will need at least a few feet between the lens and the flash.
flash-external

External flashes also allow you to use a technique the pros use all the time: 
bounce the flash. Tip the flash up so the light hits the ceiling in an indoor shot. 
The light will bounce off the ceiling and fall onto the subjects, rather than shoot 
straight at them like a built in flash. This gives the photo a more natural lighting 
effect. 

Or, use a rubber band to attach a business card to the top of the external flash to 
reflect the light up and forward at the same time. This enhances the light in your 
photos even more and eliminates the dark eye effect (the dark eye effect is when
 the eyes have a shadowy look from the light coming down from above). 
Your photos will get exponentially better with just this one technique. 
bounce-flash

Lastly, if you buy an external flash, purchase a sync cord, which lets you move 
the flash several feet away from the camera. A sync cord automatically triggers 
the flash when you take a photo, regardless of where the flash is in relation 
to the camera.


Lenses
Different lenses are one of the reasons pros use SLRs as opposed to point 
and shoot cameras. 
Most SLRs come with a zoom lens you can attach and remove, but there 
are plenty of other options out there. 
A wide angle lens (18mm, 24mm, 28mm, or 35mm) 
expands the horizons in your shot and makes photos appear more like how 
our eyes see things. This is a great lens for nature landscapes or for shooting in a room. lens-wide-landscape

A portrait lens (105mm or 135mm) shortens the background and gives peoples' 
faces the correct proportions that often appear slightly incorrect with other lenses. 
As the name suggests, this lens is good for portraits and close up shots.
  lens-distorted-edges lens-portrait

Long lenses you often see sports photographers using help you get 
closer to your subject. But, they do more than bring you closer to the action; 
they also help isolate the subject by throwing the background out of focus. 

As far as pricing is concerned, you get what you pay for. Most high quality 
lenses are several hundred dollars or more. The less expensive ones let less 
light in than the more expensive ones. They are still quality lenses, but are 
not as versatile. Visit your local store to see what lenses are available. 
Bring in your camera to try them out. 


Tripods
Tripods are an important tool for any photographer. Most pro photographers never 
hold a camera in their hands during a photo shoot, simply because their hands 
are not as stable and trustworthy as a tripod. Tripods come in a variety of sizes, 
styles, and weight allowances. Search your local store for the right tripod to 
match the rest of your equipment. The best news? Tripods don't discriminate; 
both SLRs and point and shoots can sit on a tripod! 

source: Ritzpix.com

Continue Reading...

Back To Basic - Your Camera Buddy

We all know cameras are cool, but how much do you know about 
camera hardware and accessories? If the answer is "not a lot," read on!

Most camera hardware is designed for SLR cameras, and not point and shoot cameras. 
But, I don't like to make people feel left out! For those of you out there with a point 
and shoot camera, you can still pick up some cool accessories like camera bags, 
tripods, and media cards to enhance your digital photography. 

Most camera hardware options contradict the benefits of a point and shoot camera 
anyway, namely: convenience, ease of use, and small size for portability. 
When you start adding hardware, things become a little more advanced.

For those of you who have SLR cameras (or hope to get one this holiday season!), 
here are a few hardware options you might be interested in:

External Flash
Your SLR camera already comes with a built in flash, which is fine for snapshots 
and candid photos, but really only works well when the subject is within 15 feet. 
Also, the built in flashes almost always give people red eye, because the flash 
and the lens are so close together and are pointed at the same angle when you
 take a photo. 
flash-camera

An external flash allows you to move the flash away from the lens and use a 
different angle to light your shot. Even moving it 6-12 inches away from the 
lens can eliminate red eye, though if you are shooting from a long distance 
away, you will need at least a few feet between the lens and the flash.
flash-external

External flashes also allow you to use a technique the pros use all the time: 
bounce the flash. Tip the flash up so the light hits the ceiling in an indoor shot. 
The light will bounce off the ceiling and fall onto the subjects, rather than shoot 
straight at them like a built in flash. This gives the photo a more natural lighting 
effect. 

Or, use a rubber band to attach a business card to the top of the external flash to 
reflect the light up and forward at the same time. This enhances the light in your 
photos even more and eliminates the dark eye effect (the dark eye effect is when
 the eyes have a shadowy look from the light coming down from above). 
Your photos will get exponentially better with just this one technique. 
bounce-flash

Lastly, if you buy an external flash, purchase a sync cord, which lets you move 
the flash several feet away from the camera. A sync cord automatically triggers 
the flash when you take a photo, regardless of where the flash is in relation 
to the camera.


Lenses
Different lenses are one of the reasons pros use SLRs as opposed to point 
and shoot cameras. 
Most SLRs come with a zoom lens you can attach and remove, but there 
are plenty of other options out there. 
A wide angle lens (18mm, 24mm, 28mm, or 35mm) 
expands the horizons in your shot and makes photos appear more like how 
our eyes see things. This is a great lens for nature landscapes or for shooting in a room. lens-wide-landscape

A portrait lens (105mm or 135mm) shortens the background and gives peoples' 
faces the correct proportions that often appear slightly incorrect with other lenses. 
As the name suggests, this lens is good for portraits and close up shots.
  lens-distorted-edges lens-portrait

Long lenses you often see sports photographers using help you get 
closer to your subject. But, they do more than bring you closer to the action; 
they also help isolate the subject by throwing the background out of focus. 

As far as pricing is concerned, you get what you pay for. Most high quality 
lenses are several hundred dollars or more. The less expensive ones let less 
light in than the more expensive ones. They are still quality lenses, but are 
not as versatile. Visit your local store to see what lenses are available. 
Bring in your camera to try them out. 


Tripods
Tripods are an important tool for any photographer. Most pro photographers never 
hold a camera in their hands during a photo shoot, simply because their hands 
are not as stable and trustworthy as a tripod. Tripods come in a variety of sizes, 
styles, and weight allowances. Search your local store for the right tripod to 
match the rest of your equipment. The best news? Tripods don't discriminate; 
both SLRs and point and shoots can sit on a tripod! 

source: Ritzpix.com

Continue Reading...

7/31/2010

How many shutter releases has my new Nikon D90 been tested?


Nikon DSLR cameras incorporate a shutter mechanism capable of moving extremely fast to help capture split second detail. The mechanical precision required to achieve shutter speeds up to 1/8000s is awe inspiring. However as with everything mechanical, it will likely need to be serviced or replaced someday.
There is no way to accurately tell the total number of times your camera shutter has released. While there are third party software applications designed to read a cameras shutter count, this number is not always accurate because the shutter release times may be reset by firmware updates, or reset in the Service department if certain parts are replaced or other operations are performed.
Since an exact number of releases before failure cannot be exactly calculated, a formula is used to estimate when it may occur, called MTBF ( Mean Time Between Failures). MTBF is a mathematical system that uses statistical analysis to project an average expected 'lifespan' of a given item. Based on testing and past performance, along with service information, we can formulate an estimated average number of shutter releases ( also referred to as actuations orcycles ) that can be expected before probable shutter failure.
The term Mean is referring to a mathematical average and not to an exact number- the actual amount may be higher or lower. We have compiled a short list of several Nikon models and the test data for each. Data is only available for the models listed below.

DSLR Model
 Estimated number of Shutter Actuations
 D3 - series
tested to 300,000 cycles
 D700
tested to 150,000 cycles
 D300(s)
tested to 150,000 cycles 
 D90
tested to over 100,000 cycles 
 D5000/D3000
tested to over 100,000 cycles


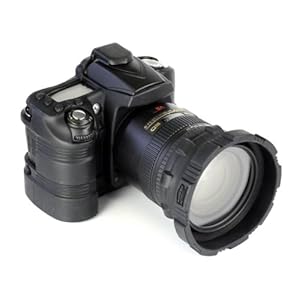
Reinforced Camera Guard Protection System for Nikon D90 SLR Cameras
Continue Reading...

5/31/2010

Getting To Know Flash Mode


Because the correct flash mode varies depending on your subject, lighting, and the
type of photography you want to do— Here’s a mini review of commonly available modes and their uses:

Auto flash Triggers the flash when the camera thinks it’s needed, which is a great
feature for casual snap shooting.

Fill (or Force) flash Fires the flash for every shot. You often need to use this
mode for good outdoor portraits.


No flash Prevents the flash from firing, which is a good thing when you’re trying
to shoot shiny objects, such as glass or chrome.

Red-eye flash Produces a mini flash that lights in advance of the main flash. The
idea is that a subject’s pupils will constrict in response to the mini flash, thereby
lessening the chance of red-eye, which is caused by the main flash reflecting in said
pupils. In a dark room, the feature rarely solves the problem entirely—which is
why manufacturers refer to this feature as red-eye reduction mode, not red-eye
prevention mode.

Slow-sync flash Enables you to use slower shutter speeds than the camera
normally allows for flash photography. When you’re shooting at night or in a
dimly lit room, this mode enables you to capture both subject and background.
Without it, the background usually appears dark.


If you’re working with an accessory flash unit instead of a built-in flash, you may
not be able to take advantage of the full range of flash modes on your camera; check
the camera and flash manual to determine your options. You may also find that you
can adjust the intensity of both the on-board flash and the external flash unit by using
a Flash EV control.
Continue Reading...
 

About Me

We Share Nikon D90 Tricks & Tips & Knowledge. Learn Taking Photo To The Next Level Like Professional. Get Update New Nikon Products Service All Around The World. View Great D90 Picture From Pro & Share Your Experience To The CLUB
"Aston inspired me about Nikon D90 when I saw him on the TV. Since then I start to learn about Nikon & Photography".

Nikon D90 CLUB