Showing posts with label D90 Club Tips. Show all posts

12/09/2010

Tips To Take Jewelry Photo


Do you ever wanted to take great picture of the Jewelry? Here is the trick ...
Jewelry can be one of the most difficult subjects to shoot because you are shooting small subjects which are generally very reflective and hard to light. You may want to look for a book or a website on specific techniques on this type of shooting as many pros spend a lifetime perfecting the techniques, and there is more information than can be covered in a short article.
However, a Micro-Nikkor lens (or more generally a "macro" lens) is a special lens designed to take very sharp images at very close focus distances. Nikon offer several different options here:
Nikon 200mm f/4.0D ED-IF AF Micro-Nikkor Lens for Nikon Digital SLR CamerasNikon 60mm f/2.8D AF Micro-Nikkor Lens for Nikon Digital SLR CamerasNikon 60mm f/2.8G ED AF-S Micro-Nikkor Lens for Nikon DSLR CamerasNikon 85mm f/3.5G AF-S DX ED VR Micro Nikkor Lens for Nikon Digital SLR Cameras
Each of the Micro-Nikkor allow the same 1:1 reproduction size but the longer focal lengths (i.e.105mm) allow you to be farther away, making it easier to properly light the subject. Other tips:
1) Use a sturdy tripod to hold the camera still.
2) Use small apertures (i.e. f22) to increase depth-of-field (zone of sharp focus) so that the entire subject is in focus.
3) "Tent" style lighting where the lights are outside a sheer fabric "tent" of diffusion material can reduce shadows/ reflections. Shoot through a hole in the tent.
4) Reflector cards can also be used to control the light.

Continue Reading...

5/30/2010

Light - How Can I Get Good Light?


Finding and generating soft, flattering light for portrait photograph

One general query I’m asked often while teaching photograph workshops is, “How am I able to improve my images?” Participants expect to listen to answers like, “Try a different lens,” or, “Change the composition.” True, these things may help, but lots of times I reply, “Try shooting the subject in better light.”
What is “better light?” With portraits, softening or diffusing the light often is the best strategy. Photographing people on a sunny day will lead to strong contrast and shadows on the subject. What are your options to soften the light? You could return on a different day with no harsh sunlight, or you could move the subject in to some shade or window light, add diffused flash to overpower the sunlight, or pop out a reflector and fill in the shadows. Let’s explore ways to soften the light.

Window Light
Since the early masters of painting, window light has been recognized as an excellent source of diffused light. Often known as “north window light,” this term refers to ambient light entering the window without any direct sun rays. In the northern hemisphere, windows facing north normally don’t have direct sun coming through them, only natural ambient light. With this in mind, virtually any window at the right time of the day can be an excellent source of diffused light for a portrait.
Window light alone makes a great portrait light. If the shadows are strong on your subject opposite the window, try using a reflector to bounce some light back onto your subject. In the event you require to soften up the light, place a large diffusion panel between the window and your subject; this will diffuse the light further.
What about moving your subject in to the shade? True, this will soften the light and eliminate any harsh shadows on a sunny day. In the event you have no other options, use shade. But shade alone is very flat light and omnidirectional, unlike window light, which originates from a directional source. Try using a reflector in the shade to add a small directional quality to the light.

Reflectors
Using reflectors is step one in learning to alter light. Reflectors produce what I call “real-time lighting.” What you see is what you get, and the light is consistent, so it’s simple to meter and adjust the angle of the light. You can make simple reflectors at home for about a dollar, though excellent collapsible reflectors are very inexpensive—no batteries needed, pop them open and start to shoot!

Reflectors come in a variety of styles, shapes and colors. There's two basic kinds of reflectors, collapsible and rigid. Small, circular collapsible reflectors are about a foot in diameter when open and fit in to your photograph bag or coat pocket. take them out of their bag, and they spring open. These reflectors work well with small subjects, from flowers to headshots. Collapsible reflectors also come in larger sizes, up to two feet or more. Advantages of collapsible reflectors are their small size and light weight.
Rigid reflectors consist of metal frames with reflective material stretched tightly across them. Some rigid reflectors collapse for simpler carrying and others don’t. The massive advantages of rigid reflectors are they don’t flutter in the wind, which makes the reflected light flicker, and they come in very giant sizes.

You also require to select what color of reflective material you require. White is the classic standard and works well for lots of applications. White isn’t adding color, it’s basically adding a small light to the subject—great to fill in shadows. Gold and soft gold are choices for adding some warm color to the subject. I find gold a small orange, so I prefer soft gold, which is a muted hue of gold. In lieu of turning skin tones orange, it adds a pleasant tan!
Silver is very bright and specular, great for adding highlights to your subject. Black will subtract light from your subject, adding shadows. Reflectors are also available in a white translucent fabric. These reflectors are more exactly called diffusers, as they diffuse and soften the light, great for use in harsh, sunny conditions. You can use them to bounce a small light, or place them between your subject and the light source to reduce its intensity.
Most reflectors come in two different colors, one on each side. My favourite combinations are soft gold/white and silver/white. I also always carryover a reflector with translucent material to diffuse the light. Another consideration in your choice will be how close you can get to your subject. If you’re using a wide-angle lens, you may require gold or silver to “throw” light a long distance to your subject. When using white, you require to be close to your subject to get much effect.

There's a number of ways to make your own reflectors. The simplest way is to buy pieces of white and black foam-core board from your local art store. Foam core works great as a reflector, in the event you leave them in a studio. Since they don’t collapse, they’re bulky to carryover in the field. To make a silver reflector, discover a small piece of cardboard (pizza delivery boxes work great) and tape aluminum foil onto it. I carryover a 12x12-inch aluminum foil reflector with me anytime I’m headed out the door.
The basic idea is to position the reflector at an angle to the sun (or light source) to redirect the light at your subject. If you’re only using one reflector and you’re close to your subject, you can hold the reflector in one hand and hit the shutter with the other (along with your camera on a tripod). If you’re a small further away, try setting your self-timer so you have time to get back to your subject and position the reflector. At some point you’ll require to have a mate hold the reflector, or use stands and clamps.
The simplest way to make use of reflectors is adding some fill light to the shadowed side of your subject. Select the color of your reflector, and bounce light back in to your subject. Experiment with reflector colors to see what you like. Sometimes I am liking a hot silver fill on my flower images, and other times soft gold looks nice. With portraits, I am liking soft gold and white. Reflected light can make people squint, so only reflect the light when you’re taking images. If your subject is wearing glasses, watch out for the reflector being reflected on the glasses.

The next step in reflector method is using over one reflector. A great combination is using one reflector with diffusion material together with a colored reflector. Position the diffusion panel above your subject to eliminate harsh, contrasty light, then add fill light using a soft gold or silver reflector. You won’t think the results!
Using a diffuser extends your shooting time in the coursework of the day. When the sun gets harsh at midday, grab your diffuser and keep on shooting. A great portrait method is to position your subject in shade, but close to the sun/shade line that you can reflect sunlight back on your subject. This leads to flattering light on your subject against a shadowed background, generating nice separation.

Flash Diffusers
At some point, using flash, whether TTL flash or larger studio strobes, will be the best solution for generating the right light. Lots of people are intimidated when you mention flash, but this is based on elderly perceptions that flash requires lots of technical expertise. Today’s TTL flashes are very correct and simple to make use of. Two times you discover the possibilities using flash, you’ll see the world through a brand spanking new set of eyes!
The simplest way to make use of flash is with a TTL flash mounted on top of your camera. Light from TTL flash is very directional and not diffused, but there's lots of options to diffuse TTL flash. Lots of TTL flashes have small, white flash-card diffusers that pop up. These are used by tilting the flash head up, not aiming at your subject, and shooting away. The flash is reflected by this small card onto your subject, bouncing the light than sending it head-on.
Another option here is putting a small plastic diffusion cap on the flash, thereby diffusing the direct strobe. If you’re in a room with a white ceiling, try aiming your flash head at the ceiling and shooting. The ceiling acts as one giant reflector, greatly diffusing the light. But recognize the bounced light will have the color of the ceiling, so don’t try this on a green ceiling unless you require alien light!

An important principle to keep in mind is that the larger your light source, the more diffused the light and softer the shadows. Small flash attachments will help diffuse the light and sometimes are the most practical solution, but I usually prefer softer light sources for my portraits, and a small softbox attached to a TTL flash works great. Lastolite makes the 24-inch EzyBox, a softbox with a bracket designed for TTL flash. This handy tool comes in a small bag, and when you take it out it pops in to its shape. What’s even better is that the box has a variety of panels with Velcro® on the front to alter the light, from small circle panels to long rectangle shapes. I was two times recently in Kenya photographing the Masai, and this softbox became my light of choice. I could set it up in under a minute and start shooting. I used an SU800 wireless trigger to pop the TTL flash off-camera. Using your flash off-camera greatly improves your portraits, since it lets you angle the light the way you require it.

You can also shoot your TTL flash through diffusion panels or off reflectors to diffuse the light. Having one or two TTL flashes in your camera bag isn’t a lot to carryover and gives you an fabulous set of tools to generate portraits using diffused light.
Beyond TTL flash comes studio strobes, and with this resource comes a large assortment of accessories to diffuse the light. The most basic are softboxes, which can be one foot square to larger than two feet square. Flashes are attached to these boxes, and the light is shot through diffusion panels and the outside fabric, making a pleasant, diffused light. For very diffused light, try shooting strobes through softboxes and then through a large diffusion panel, getting “double diffusion” before hitting your subject.

My favourite tool for generating diffused light when shooting portraits is the Elinchrom Octabank. This seven-foot circular softbox with silver interior produces fabulous, even diffused light. Unlike other softboxes, where the flash head shoots straight through the box, the flash in the Octabank is oriented pointing at the back of the bank. The flash bounces off the back of the Octabank before going forward through the front, generating even softer light. If you’re thinking of getting in to serious portrait work, studio accessories like the Octabank are a sound investment.

Whether you make portraits for fun or profit, or both, all of these tips will help you control your light for more flattering results.
Continue Reading...

5/19/2010

How To Take Jumping Action


Jumping portrait become more famous, in order to get the best of it so I have some recommend for you.


  1. Go for very fast speed like 1/500 or above (increase your ISO if necessary).
  2. Take the picture from low level (angle), include floor or ground to make it look more height.
  3. Press the shutter at the peak of the jump, focus on their face and eye.
That's it. Have fun


Continue Reading...

4/28/2010

Wedding Photography Tips


Below are some of the tips to get the Best digital photography for your wedding.

1. Choose the right background. 

Photos can really look great once they are shot with the perfect background. You can use the decorations in the church and in the reception areas as a back draft for your photos. Be sure to fix some scattered decorations so that they will appear simply perfect on photos.

Always remind the photographer to check if the view is good when taking pictures. It does not mean that you have to stand on the same corner or place. The Best photographer is able to make even the simplest of background look great on photo if it is taken in the right angle.

2.  Look out for any kinds of glass. 

Glasses tend to cause reflections in photos. May it be an eyeglass, window or wine glasses.  One way or another, they will cause a reflection or brightness to reflect back on the camera it is included in the picture.

To avoid this, the position of the camera can be altered so that it will not directly hit the glass. The photo can be taken sideways or downwards but never on eye level.

3. The perfect timing.

Persons being photographed should not always be looking at the camera. And they do not have to be smiling at the lens too.

One way of doing it is to wait for the right moment so that you can have a candid shot at them. You will see that catching persons on film when they are in their candid state is much better than having them wearing a fixed expression. Candid moments make photos look real and natural.

4. Review each photo.

To maximize the memory that your digital camera has, it is Best to review every shot taken. There might be duplicates that can be removed so that you can free more space for a different shot.

You will probably want the Better and the maximum number of digital wedding photography shots so you need to make the most of the capacity of the digital camera.

The Best wedding photography is made even better now with digital cameras. This is one thing that you definitely should have on your special day.

Continue Reading...

1/20/2010

Great Sunset Portraits


Everyone wants to shoot portraits at sunset because the sky is so gorgeous, but the problem generally is that

(a) your subject either comes out as a silhouette because the sunset is behind them, or
(b) you use a flash and your subject looks washed out.


Here's how to get great portraits at sunset without washing out your subject:

Start by turning off your flash and aim at the sky.
Then hold your shutter button halfway down to take an exposure reading from the sky, and while still holding the shutter button halfway down (or you can turn on the exposure lock button on your digital camera), recompose the shot by aiming at your subject, but now turn the flash on and reveal your subject with the light of the flash.

 This way, your subject gets fill flash, but the sky behind them still looks great. It's an old trick, but it's still around because it works so well.

Nikon SB-400 AF Speedlight Flash for Nikon Digital SLR CamerasNikon SB-400 AF Speedlight Flash for Nikon Digital SLR Cameras
Continue Reading...

12/20/2009

Is It Better to Underexpose or Overexpose?


There have been some theories bouncing around a few of the photography forums on the Web that claim that you should underexpose by a stop for digital photography.

First off, let me say this: your goal (my goal, our common goal) is to get the proper exposure. That's our goal. Always. But if that's not possible, if given a choice between overexposing (a photo that's a bit too light) and underexposing (a photo that's a bit too dark), go with overexposing you'll have less noise.

That's because noise is most prevalent in the shadows, and if you have to lighten an underexposed photo, in Photoshop (see tip below) you're lightening (increasing) the noise in the photo. That's why it's better to shoot lighter (overexposed), because darkening a photo doesn't increase noise the way lightening it does.

So, if you'd rather have one than the otheroverexpose (but again, or goal is to do neither. That's why we bought these fancy cameras with their highly advanced metering systems).
Continue Reading...

12/13/2009

Shooting Fireworks Made Easy


This is another one that throws a lot of people (one of my best friends, who didn't get a single crisp fireworks shot on the Fourth of July, made me include this tip just for him and the thousands of other digital shooters that share his pain).

For starters, you'll need to shoot fireworks with your camera on a tripod, because you're going to need a slow enough shutter speed to capture the falling light trails, which is what you're really after. Also, this is where using a cable release really pays off, because you'll need to see the rocket's trajectory to know when to push the shutter buttonif you're looking in the viewfinder instead, it will be more of a hit or miss proposition.

Next, use a zoom lens (ideally a 200mm or more) so you can get in tight and capture just the fireworks themselves. If you want fireworks and the background (like fireworks over Cinderella's Castle at Disney World), then use a wider lens.

Now, I recommend shooting in full manual mode, because you just set two settings and you're good to go:

(1) set the shutter speed to 4 seconds, and
(2) set the aperture to f/11.

Fire a test shot and look in the LCD monitor to see if you like the results.
If it overexposes, lower the shutter speed to 3 seconds, then check the results again.

Tip: If your camera has bulb mode (where the shutter stays open as long as you hold the shutter release button down), this works greathold the shutter button down when the rocket bursts, then release when the light trails start to fade. (By the way, most Canon and Nikon digital SLRs have bulb mode.) The rest is timingbecause now you've got the exposure and sharpness covered.
Continue Reading...

12/04/2009

The Golden Rule of Landscape Photo


There's a golden rule of landscape photography, and you can follow every tip in this chapter, but without strictly following this rule, you'll never get the results the top pros do.

As a landscape photographer, you can only shoot two times a day

1. dawn
You can shoot about 15 to 30 minutes before sunrise, and then from 30 minutes to an hour (depending on how harsh the light becomes) afterward. The only other time you can shoot is:

(2) dusk 
You can shoot from 15 to 30 minutes before sunset, and up to 30 minutes afterward.

Why only these two times? Because that's the rule.

Okay, there's more to it than that. These are the only times of day when you get the soft, warm light and soft shadows that give professional quality lighting for landscapes.

How stringent is this rule? I'll never forget the time I was doing a Q&A session for professional photographers. The other instructor was legendary National Geographic photographer Joe McNally. A man in the crowd asked Joe, "Can you really only shoot at dawn and dusk?" Joe quietly took his tripod and beat that man to death. Okay, that's an exaggeration, but what Joe said has always stuck with me. He said that today's photo editors (at the big magazines) feel so strongly about this that they won't even consider looking at any of his, or any other photographer's, landscape work if it's not shot at dawn or dusk. He also said that if he takes them a shot and says, "Look, it wasn't taken during those magic hours, but the shot is amazing," they'll still refuse to even look at it.

The point is, professional landscape photographers shoot at those two times of day, and only those two times. If you want pro results, those are the only times you'll be shooting, too.
Continue Reading...

11/09/2009

Sharper Image By Stop Down Aperture


Another trick the professional use is,... 

When possible, shoot at your lens' sharpest aperture.
For most lenses, that is about two full stops smaller than wide open (so the f-stop number you use will go higher by two stops).

For example, if you had an f/2.8 lens, the sharpest apertures for that lens would be f/5.6 and f/8 (two full stops down from 2.8).

Of course, you can't always choose these apertures, but if you're in a situation where you can (and we'll talk about this later in the book), then shooting two stops down from wide open will usually give you the sharpest image your lens can deliver.

Now, that being said, this isn't true for all lenses, and if that's not the case with your lens, you'll find your lens' sweet spot (its sharpest aperture) in short order if you keep an eye out for which aperture your sharpest images seem to come from.


You can do that by looking at your photos' EXIF data (the background information on your shots embedded by your digital camera into the photos themselves) in Photoshop by going under Photoshop's File menu and choosing File Info.

Then click on Camera Data 1. It will show the aperture your shot was taken at. If you find most of your sharpest shots are taken with a particular aperture, then you've found your sweet spot.

However, don't let this override the most important reason you choose a particular aperture, and that is to give you the depth of field you need for a particular shot. But it's just nice to know which f-stop to choose when your main concern is sharpness, not controlling depth of field.

Continue Reading...

10/25/2009

Where To Focus When Shooting?


Over the years, there have been conflicting thoughts as to where the optimal place is to focus your camera when shooting portraits (the cheek, the tip of the nose, the hairline, etc.).

Luckily, today the consensus is fairly clear (you'll still find some cheek holdouts here and there, but don't let them throw you): focus directly on the subject's eyes.

By shooting at f/11 and focusing on the eyes, this will give you a nice level of sharpness throughout the face (and most importantly, the eyes will be tack sharp, and in portraits that is absolutely critical).

Continue Reading...

10/23/2009

The Trick to Shooting Waterfalls


Ever want to get that silky waterfall or that stream effect you see in those pro photos?

The secret is leaving your shutter open (for at least a second or two), so the water moves while everything else (the rocks and trees around the waterfall or stream) remains still.

Here's what you do:
Switch your digital camera to shutter priority mode (the S or Tv on your camera's mode dial), and set the shutter speed to 1 or 2 full seconds.

Now, even if you're shooting this waterfall on a bit of an overcast day, leaving your shutter open for a few seconds will let way too much light in, and all you'll get is a solid white, completely blown-out photo.

That's why the pros do one of two things: 
(1) they shoot these waterfalls at or before sunrise, or just after sunset, when there is much less light.

Or they (2) use a stop-down filter. This is a special darkening filter that screws onto your lens that is so dark it shuts out most of the light coming into your camera.

That way, you can leave the shutter open for a few seconds. Such little light comes in that it doesn't totally blow out your photo, and you wind up with a properly exposed photo with lots of glorious silky water.

Now, if you don't have a stop-down filter and you run across a waterfall or stream that's deep in the woods (and deep in the shade), you can still get the effect by trying this: put your camera on a tripod, go to aperture priority mode, and set your aperture to the biggest number your lens will allow (probably either f/22 or f/36). This leaves your shutter open longer than usual (but that's okay, you're in deep shade, right?), and you'll get that same silky-looking water.

Continue Reading...

Trick for Low-Light Shooting


Although you usually should use a tripod when shooting the formals (the group shots after the ceremony with the bride, groom, family members, etc.), when shooting the wedding ceremony in a low-light situation like a church, you'll often need to hand-hold your shots.

This is a problem because hand-holding in low-light situations is almost a guarantee of having blurry photos (because of the slow shutter speeds of low-light situations).

So, how do the pros get those crisp low-light shots in a setting like a church?

Two things:
(1) they increase their digital camera's ISO (the digital film speed). Today's digital SLR cameras (in particular, the Nikons and Canons) let you shoot at very high ISOs with little visible noise. So how high can you go? At least ISO 800 (see LCD panel above), but you can usually get away with as high as ISO 1600 in most situations. This lets you get away with hand-holding in the low light of a church, while avoiding the camera shake you'd get at ISO 100 or 200.

(2) They shoot with their fastest lens (your lens with the largest available f-stop, like f/1.4, f/2.8, or f/3.5), which lets in more available light, allowing you to shoot in lower light without blurring your images.


If you're shooting in very high ISOs, you'll want to know about a popular Photoshop plug-in for wedding photographers called Noise Ninja (from PictureCode.com). Besides reducing noise, a happy side effect is that it also smoothes skin.


Continue Reading...

10/03/2009

15 Steps To Take Great Flower Shots


1) Wide-Angle Lens Have Their Place
If you'd like to show an individual plant or a group of plant in their surrounding,
then the wide-angle lens is the tool for the job. Dept of field is also increased, so your image will be sharp all the way from foreground to background.


2) Experiment with Flash
Flash can help you produce impressive image, but be careful not to overdo it.

3) Move Indoor
No day light waiting and no worry about subject moving.


4) Switch-Off Auto focus
Dept-Of-Field is so narrow in closed-up photography that precise focusing is critical.
To ensure your shots are sharp, try switch to manual focus.

5) Composition Skill
Composing with the subject off-center can instantly give your image a professional look.

6) Choose the right view point
Take from eye level to the subject.

7) Just add water
Adding a few drops of water can really help to bring your flowers photography to life.


8) Use Tripod
You can fine-tune composition and keep the point of focus exactly where you want it.

9) Go Telephoto
This is good if you plan to take individual plane.

10) Remote Release
Use it when possible to get sharp image.

11) Watch The Weather
Check out if you want to take under direct Sun light.

12) Use a Reflector
It will help to reduce shadow area.


13) Marco Lens
Get close to subject to fill the frame.

14) Shoot in Manual
Freely adjust aperture and shutter will result in getting what you want.


15) Watch Your Backgrounds
Be careful messy background can ruin you image.
Continue Reading...

10/02/2009

Exposure Top 10 Tips


On the face of it, exposure seems a pretty straightforward business. In order to produce a good range of tones in your picture, the camera has to make sure the right amount of light reaches the sensor. And it does this (or you do) by adjusting the length of the exposure (the shutter speed) and the light intensity (the lens aperture). The image is formed by the accumulation of light on the sensor during the exposure. All digital cameras incorporate exposure systems which will do this automatically, so what’s the problem? Even the most sophisticated metering system is unable to understand what the camera’s looking at, or what the photographer’s intentions might be. This is where you need to take control. Here are 10 good tips to guide you to get what you want.


1) TAKE A MID-TONE WITH YOU
Pack a grey card in your camera bag – or buy a mid-toned camera bag which you can meter off.

2) LOOK AT THE HISTOGRAM
Don’t rely on a simple playback image to judge exposure – let the camera show you precisely

3) WATCH THE BACKGROUND
Be aware of how the tone of a background can influence your camera’s meter.

4) BE AWARE OF HIGHLIGHTS
When exposing for dark subjects, look for any bright areas that might be blown out as a result.

5) SWITCH TO SPOT METERING
For tricky lighting and small areas, there’s no substitute for spot metering if you’re not in a rush.

6) RESTORE THE WHITENESS
If your subject’s large in the frame and bright white, spot meter off them and add 2 EV to 2.5 EV.

7) METER FOR HIGHLIGHTS
As a general rule, it’s best to meter for the highlights and let the shadows fall where they will.

8) CARRY A SET OF FILTERS
Always pack a graduated neutral density filter and polariser – they’re not just useful for ‘pure’ landscapes…

9) DIAL DOWN YOUR FILL FLASH
With digital cameras so good at picking up shadow detail, you’ll be surprised how little fi ll fl ash you need.

10) GET CREATIVE
Don’t always chase the ‘perfect’ exposure. Experiment with going to extremes.

Continue Reading...

9/12/2009

D90 My Style Setup


My preferred Nikon D90 parameters setup for landscape picture.
I always use it when the light is in good condition. The picture is more outstanding compare to the default setup. That's my thought.


- Active D-lighting = Off
- Sharp 1,2
- Contrast
-1
- Brightness
-1
- Sat
+1, +2
- Hue
0


What's about you? How do you setup your D90?
Continue Reading...

4 Tips for Better HDR Photos


One look at flickr or SmugMug and it’s easy to see HDR photos are all the rage.
HDR, an acronym for High Dynamic Range, is a method of processing digital photographs. Three or more digital images are combined to create a composite with a wider range of tones and detail. One image is neutral, one over-exposed, and one under-exposed. The over-exposed image adds details and improved tones in the shadow areas, the under-exposed image doing the same to the highlight areas.
Combining the images is only half the battle. Using software, the combined image must be tone mapped, reducing the contrast and improving it aesthetically and technically for printing. Tone mapping could be considered a black art – getting the level perfect requires patience (and voodoo).
Playing with HDR can be a lot of fun and open up some new visual possibilities for your photographs. It’s easy to get started, if you have a DSLR all you need is HDR software. Photomatix Pro by HDRsoft is the leading application for combining and tone mapping HDR images.
Before you can start processing the images you need to take them. Here are the tips on taking HDR photos:
  • Use a tripod and remote shutter release. The three or more photos you are taking need to be identical as they will be combined. A tripod will allow you to lock your camera in position, and a remote shutter release will cut down possible vibrations or minute changes encountered when using the shutter release button on the camera.
  • Use the lowest ISO setting on your camera.  The images will have less digital noise and be noticeably sharper than high ISO images. Don’t shoot you images at ISO 800. Set your camera at ISO 100 or ISO 200.
  • Go manual. Some photographers advise using the auto-bracketing setting on your camera. Adjusting this setting to -2 and +2 EV will provide you with the three image needed for HDR work. Beware. Depending on how your camera accomplishes this you may be changing the depth of field in the images. For best results shoot in manual mode, and change the shutter speed to over and under-expose the images, not the aperture. If auto-bracketing is available in your camera’s Aperture Priority mode, that can be used instead of manual mode.
  • Shoot in RAW. Don’t shoot JPGs. RAW images, digital negatives, record more data than JPGs. Your final HDR results will be better with RAW files than JPGs that have been processed and compressed by your camera.
After the images are captured it’s time to experiment. Be warned: Processing HDR images can take hours – as you will get deeply involved trying to create the perfect image. Have fun.
resource: journal.phottix.com/category/photography-tips
Continue Reading...

5 Easy Tips for Better Photographs


We all want to take better photos. There are some simple things you can do to improve your results. Give these 5 Tips for better photographs a try. A Digital SLR or a point and shoot, these tips can be used by any photographer.
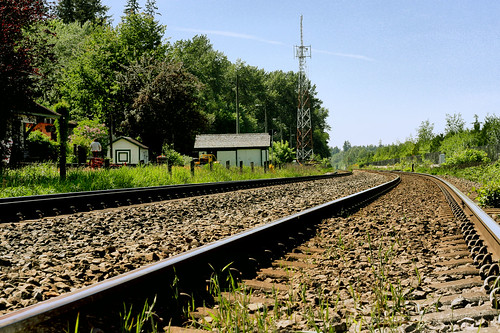
riding the rails collecting rocks
Go high or go low. Don't shoot from the same height.

1. Go high or go low

Change your vantage point.  A series of photographs all shot from shoulder-level are  boring. If you’re shooting children or the family dog get down on their level. If shooting portraits try standing on a chair. Look for a different angle than “dead-on.”

2. Use your flash outdoors

You may think shooting outside means you don’t need to use your flash. Wrong. Using fill flash outside can help reduce shadows and balance difficult lighting conditions. On overcast days flash can help make the colors in your photos “pop” A Phottix Flash Diffuser is a great addition to your gear.
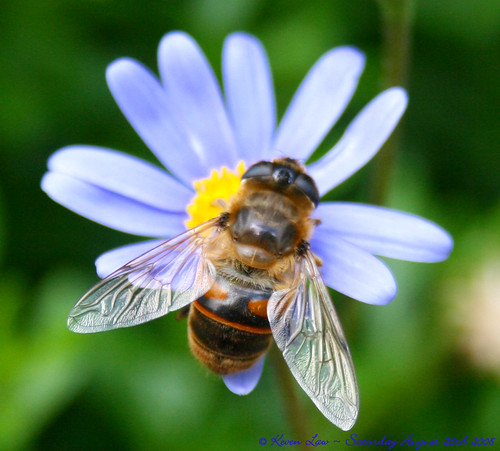
HBWE...Everybody...:O))
Get as close as you can.

3. Get close. Then get closer

Don’t depend on your camera or lens’ zoom capabilities. Zoom with your legs. Get as close as you can to your subject, then get closer. Fill your viewfinder with the subject before taking the photo. Your images will be more detailed and distracting backgrounds will be eliminated.

4. Become one with the light

Photography is all about light. Learn to read it. Before you press the shutter release take a good look at what’s in your viewfinder. Are there distracting shadows? Is something too bright? Try to avoid shooting outside at midday, the light is too harsh. Schedule your shoots for early morning or late afternoon/early evening when sunlight adds lovely tones to your images.

5. Use the Rule of Thirds

Simply: Don’t shoot every photo with the subject dead center. Try to position the subject you are photographing off-center, along the thirds (like a tic-tac-to board). Add some drama to your photos with more foreground or background.
source: "journal.phottix.com/category/photography-tips"
Continue Reading...

9/10/2009

Select The Right Filters For Nikon D90


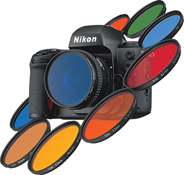
Nikon manufacturers a wide variety of filters for film and digital SLRs.
Achieving accurate White Balance with filters: ND, Circular Polarizer, UV filters have no color bias and will not affect the white balance metering and can be used in Auto White Balance mode (AWB). Color correction filters and graduated filters will affect the white balance setting, using AWB with these filters will result in the camera attempting to correct for the color of the filter.
Metering with filters: Nikon recommends the use of center-weighted metering when using a filter with an exposure factor greater than 1x. For more details, see the manual provided with the filter:
Filters for Color and B&W Photography
Available Circular Polarizing Filters
Filter size
Product #
52mm
2233
58mm
2236
62mm
2252
67mm
2255
72mm
2257
77mm
2260
Find a local dealer
Circular Polarizing Filters: By reducing the light reflected from non-metallic surfaces, polarizing filters allow direct shooting through glass windows and reduce the glare from water surfaces and sunlit trees and grass. They are the only filters that darken the sky in color photography without affecting color balances. Nikon circular polarizing filters come in a rotating mount to enable different angles for different degrees of polarization, and effects may be seen in the viewfinder as the filter is rotated. Nikon DSLRs cannot be used with linear polarizing filters due to its affect on AF and exposure metering. Circular and linear polarizing filters do not interfere with the autofocus or auto exposure operation of the Nikon AF SLRs. They may, however, reduce the overall amount of light entering the lens just enough to reduce autofocus function on some slower lenses.
Available Soft focus filters
Filter size
Product #
52mm
4296
62mm
4927
67mm
4928
72mm
4929
77mm
4930
Find a local dealer
Nikon NEW Soft Focus Filters: These filters reduce contrast and create a moderate softness and beautiful, blurred contours while amintaining a sharp rendition of the core subject. As the resulting pictures have a natural feel to them, the filters can be widely used for all types of subjects. NOTE: The effects of the filters vary depending on lighting conditions and lens focal lengths. Therefore, shooting numerous test shots is recommended.
Available UV filter
Filter Size
Product #
39mm (L37c)
2369
Find a local dealer
Ultraviolet L3&C, L39 Skylight L1BC: While invisible to the naked eye, ultraviolet light can reduce contrast and detail. The colorless UV filters not only produce sharper, non-hazy B&W prints, they correct the blue or violet tints that may occur with color film. The L27C is multilayer coated to further reduce reflection and the L39 is good for B&W prints of mountain or beach scenes. Both may be used as lens protectors. The multilayer coated Skylight L1BC also cuts UV light and is often left on the lens to protect it. The Skylight L1BC may affect color balance due to its slight pink color.
Filters for B&W Photography ( These filters are no longer available from Nikon.)
Yellow Y44, Y48, Y52: Yellow filters absorb both the blue and ultraviolet light, so that skies appear darker in a B&W print. They are particularly useful for heightening contrast. Mild filter Y44 and medium filter Y48 are best suited for portraits and snap shots. Y52 offers the strongest effects and is commonly used for landscape photography.
Orange O56, Red R60: The O56 and R60 offer greater contrast between sky and subjects than Y-series filters. The 056 subtracts green as well as blue and ultraviolet. The R60 subtracts all colors of the spectrum except red and is often used with infrared film for special effects.
Green X0, X1: Green filters subtract red and blue and let through green and yellow. Although both XO and X1 absorb the same amount of blue, the XO absorbs less red than the X1, so its effect is milder. The XO is used for general-purpose shooting, while the X1 is most effective for portraits.
Filters for Color Photography ( These filters are no longer available from Nikon.)
Amber A2, A12: Because they subtract blue, amber filters correct the bluish colorations that sometimes affects daylight film. The mild A2 filter warms scenes shot on cloudy days or in the shade. The deeper colored A12 is used with tungsten film for outdoor shooting in fair weather.
Blue B2, B8, B12: Blue filters subtract red and thus cool down colorations. B2 is a mild filter used with daylight film to remove the reddish tinge from sunrise and sunset shots. The medium-blue B8 corrects color when clear flashbulbs are used with daylight film. B12 is a color conversion filter which naturalizes the red cast produced by photofloods when shooting indoors with daylight film.
Slip-in Circular Polarizing Filters: Designed for use in combination with telephoto lenses equipped with a slip-in filter holder, these filters reduce flare from non-metallic surfaces such as glass and water. Simply turn the rotating ring on the holder to find the most effective position. The filters do not affect autofocus or auto exposure features. They may, however, reduce the overall amount of light entering the lens just enough to reduce autofocus function on some slower lenses.
Image
Neutral Color NC Filters: Available in attachment sizes 39mm, 46mm, 52mm, 62mm, 72mm and 77mm, these neutral-color filters serve as lens protectors. They do not affect color balance. In addition, multilayer coating prevents light reflection inside the glass, thus improving color rendition.
Available Neutral Color filters
Filter size
Product #
52mm
2479
58mm
2483
62mm
2480
67mm
2288
72mm
2481
77mm
2482
Find a local dealer
Graduated Filters: Nikon DSLRs have a DX sensor which is smaller than the 35mm film area. If using graduated filters intended for 35mm film cameras such as Cokin or Lee filter systems, the area of graduation will cover more area with the DSLR as compared to the 35mm film. When using a DSLR the central 2/3 of the filter area will be used. This results in the filter producing an image with less saturated color graduation than a 35mm film camera image.
Continue Reading...
 

About Me

We Share Nikon D90 Tricks & Tips & Knowledge. Learn Taking Photo To The Next Level Like Professional. Get Update New Nikon Products Service All Around The World. View Great D90 Picture From Pro & Share Your Experience To The CLUB
"Aston inspired me about Nikon D90 when I saw him on the TV. Since then I start to learn about Nikon & Photography".

Nikon D90 CLUB