

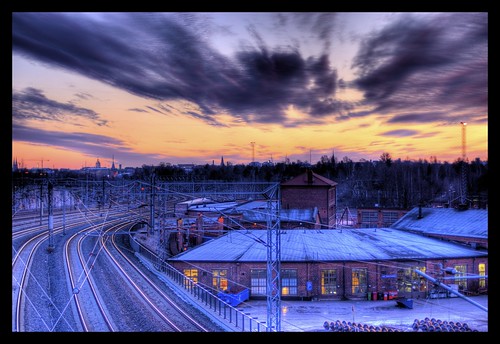
One look at flickr or SmugMug and it’s easy to see HDR photos are all the rage.
HDR, an acronym for High Dynamic Range, is a method of processing digital photographs. Three or more digital images are combined to create a composite with a wider range of tones and detail. One image is neutral, one over-exposed, and one under-exposed. The over-exposed image adds details and improved tones in the shadow areas, the under-exposed image doing the same to the highlight areas.
Combining the images is only half the battle. Using software, the combined image must be tone mapped, reducing the contrast and improving it aesthetically and technically for printing. Tone mapping could be considered a black art – getting the level perfect requires patience (and voodoo).
Playing with HDR can be a lot of fun and open up some new visual possibilities for your photographs. It’s easy to get started, if you have a DSLR all you need is HDR software. Photomatix Pro by HDRsoft is the leading application for combining and tone mapping HDR images.
Before you can start processing the images you need to take them. Here are the tips on taking HDR photos:
- Use a tripod and remote shutter release. The three or more photos you are taking need to be identical as they will be combined. A tripod will allow you to lock your camera in position, and a remote shutter release will cut down possible vibrations or minute changes encountered when using the shutter release button on the camera.
- Use the lowest ISO setting on your camera. The images will have less digital noise and be noticeably sharper than high ISO images. Don’t shoot you images at ISO 800. Set your camera at ISO 100 or ISO 200.
- Go manual. Some photographers advise using the auto-bracketing setting on your camera. Adjusting this setting to -2 and +2 EV will provide you with the three image needed for HDR work. Beware. Depending on how your camera accomplishes this you may be changing the depth of field in the images. For best results shoot in manual mode, and change the shutter speed to over and under-expose the images, not the aperture. If auto-bracketing is available in your camera’s Aperture Priority mode, that can be used instead of manual mode.
- Shoot in RAW. Don’t shoot JPGs. RAW images, digital negatives, record more data than JPGs. Your final HDR results will be better with RAW files than JPGs that have been processed and compressed by your camera.
After the images are captured it’s time to experiment. Be warned: Processing HDR images can take hours – as you will get deeply involved trying to create the perfect image. Have fun.
resource: journal.phottix.com/category/photography-tips


0 comments:
Post a Comment