| Filters for Color and B&W Photography |
Available Circular Polarizing Filters |
Filter size | Product # |
52mm | 2233 |
58mm | 2236 |
62mm | 2252 |
67mm | 2255 |
72mm | 2257 |
77mm | 2260 |
Find a local dealer | Circular Polarizing Filters: By reducing the light reflected from non-metallic surfaces, polarizing filters allow direct shooting through glass windows and reduce the glare from water surfaces and sunlit trees and grass. They are the only filters that darken the sky in color photography without affecting color balances. Nikon circular polarizing filters come in a rotating mount to enable different angles for different degrees of polarization, and effects may be seen in the viewfinder as the filter is rotated. Nikon DSLRs cannot be used with linear polarizing filters due to its affect on AF and exposure metering. Circular and linear polarizing filters do not interfere with the autofocus or auto exposure operation of the Nikon AF SLRs. They may, however, reduce the overall amount of light entering the lens just enough to reduce autofocus function on some slower lenses. |
Available Soft focus filters |
Filter size | Product # |
52mm | 4296 |
62mm | 4927 |
67mm | 4928 |
72mm | 4929 |
77mm | 4930 |
Find a local dealer | Nikon NEW Soft Focus Filters: These filters reduce contrast and create a moderate softness and beautiful, blurred contours while amintaining a sharp rendition of the core subject. As the resulting pictures have a natural feel to them, the filters can be widely used for all types of subjects. NOTE: The effects of the filters vary depending on lighting conditions and lens focal lengths. Therefore, shooting numerous test shots is recommended. |
Available UV filter |
Filter Size | Product # |
39mm (L37c) | 2369 |
Find a local dealer | Ultraviolet L3&C, L39 Skylight L1BC: While invisible to the naked eye, ultraviolet light can reduce contrast and detail. The colorless UV filters not only produce sharper, non-hazy B&W prints, they correct the blue or violet tints that may occur with color film. The L27C is multilayer coated to further reduce reflection and the L39 is good for B&W prints of mountain or beach scenes. Both may be used as lens protectors. The multilayer coated Skylight L1BC also cuts UV light and is often left on the lens to protect it. The Skylight L1BC may affect color balance due to its slight pink color. |
| Filters for B&W Photography ( These filters are no longer available from Nikon.) |
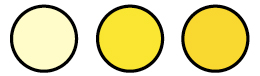
| Yellow Y44, Y48, Y52: Yellow filters absorb both the blue and ultraviolet light, so that skies appear darker in a B&W print. They are particularly useful for heightening contrast. Mild filter Y44 and medium filter Y48 are best suited for portraits and snap shots. Y52 offers the strongest effects and is commonly used for landscape photography. |
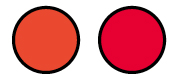
| Orange O56, Red R60: The O56 and R60 offer greater contrast between sky and subjects than Y-series filters. The 056 subtracts green as well as blue and ultraviolet. The R60 subtracts all colors of the spectrum except red and is often used with infrared film for special effects. |
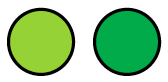
| Green X0, X1: Green filters subtract red and blue and let through green and yellow. Although both XO and X1 absorb the same amount of blue, the XO absorbs less red than the X1, so its effect is milder. The XO is used for general-purpose shooting, while the X1 is most effective for portraits. |
| Filters for Color Photography ( These filters are no longer available from Nikon.) |
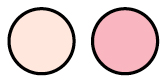
| Amber A2, A12: Because they subtract blue, amber filters correct the bluish colorations that sometimes affects daylight film. The mild A2 filter warms scenes shot on cloudy days or in the shade. The deeper colored A12 is used with tungsten film for outdoor shooting in fair weather. |
 | Blue B2, B8, B12: Blue filters subtract red and thus cool down colorations. B2 is a mild filter used with daylight film to remove the reddish tinge from sunrise and sunset shots. The medium-blue B8 corrects color when clear flashbulbs are used with daylight film. B12 is a color conversion filter which naturalizes the red cast produced by photofloods when shooting indoors with daylight film. |
| Slip-in Circular Polarizing Filters: Designed for use in combination with telephoto lenses equipped with a slip-in filter holder, these filters reduce flare from non-metallic surfaces such as glass and water. Simply turn the rotating ring on the holder to find the most effective position. The filters do not affect autofocus or auto exposure features. They may, however, reduce the overall amount of light entering the lens just enough to reduce autofocus function on some slower lenses. |
 | Neutral Color NC Filters: Available in attachment sizes 39mm, 46mm, 52mm, 62mm, 72mm and 77mm, these neutral-color filters serve as lens protectors. They do not affect color balance. In addition, multilayer coating prevents light reflection inside the glass, thus improving color rendition. |
| Available Neutral Color filters |
Filter size | Product # |
52mm | 2479 |
58mm | 2483 |
62mm | 2480 |
67mm | 2288 |
72mm | 2481 |
77mm | 2482 |
Find a local dealer |


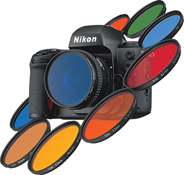 Nikon manufacturers a wide variety of